Friday, May 13, 2016

Color Me Excited!!

I mentioned back in the introduction post how I LOVE color but am married to a man who can only abide neutrals. As referenced in the title of this blog, I am sure that some one of my Irish ancestors must surely have been a "tinker"....the name for travelers/gypsies that move through the countryside in their vardos.


My love of all things bright combined with my incessant urges to hop in my car and tour the country are all I have to fuel my suspicion of my "tinker" roots. However, even my more settled Irish ancestors are also known to brighten up their facades!!


For instance in my paternal great-grandparents region on the Beara Peninsula of County Cork you will find the rainbow of facades shown in the picture above!

Then there is the love of color shown by the people of my daughters' homeland of Guatemala!


If I could have figured out how to fit those screens in my luggage they would probably be slated for use in the Can's remodel!! But not just in their decor is color confidently on display...


There are countless gardens and fountain scenes like this one in Antigua, Guatemala all over the country.


Then there are the chicken buses which serve as the backbone of the public transportation system in Guatemala!! I mean isn't it just natural that my own personal "vardo" will feature COLOR?!?!?

Besides the obvious cushion and curtain features which can display color, I decided I wanted the doors and drawer in the kitchen to sing a rainbow to my soul! What follows below is a tutorial of how I turned my cabinet doors and drawer front colorful.


 The first thing I did was make a paper pattern of each door and drawer front. After deciding on the "style" I am hoping to convey, I cut the paper into a template. Being careful to pay attention to the design orientation of the fabric that I bought for the cushion backs, I laid the paper on the fabric and traced around the template.


The arrows point to the marker lines visible when the paper pattern is removed. Using sharp trimming scissors cut along the marked lines to get a finished fabric panel.


Here is one fabric panel awaiting decoupaging onto its door front and one fabric panel already affixed on its door panel.


I then used a gloss Modpodge painted on the back of the fabric panel to attach it to the painted wood panel. You can get some on the right side without concern because the next step is to generously apply the Modpodge to the correct side of the affixed fabric panel. You do want to be careful not to get the Modpodge on the surface left uncovered from fabric as it will dry with a visible "gloss".


The fabric will look cloudy when the Modgepodge is applied!!! Do not worry as it will dry clear.


When the fabric panel was dry I then went back with acrylic paint and added my border color. Now after doing 4 of the six panels of my camper I did happen on another "time saver". If I was blessed with more patience and less instant gratification drive I probably would be done with all of these by now! The last two panels I decided to paint the orange FIRST and then Modpodge the fabric saving me from all those curves needing to be carefully painted.


The orange border then needed to be framed!! I used some left over acrylic paint from another project and painted a thin line to accentuate the fabric.


One mention here that I am NOT sponsored by any of the products I may show you that I use!! I just put it up here to hopefully save you the bazillion hours of Google searching like I have been doing during this remodel! I finished up the process by sealing it all with a clear acrylic spray on sealer that I bought at Walmart. Time will tell if it holds up or yellows!!


Remember I told you that the old fabric from the Can became my drop cloths?? Quite visually overwhelming to see print on print, sorry! This is the last view I can give you because I want to save the whole effect for the "big reveal" post. Despite my plans to reuse the hinges I did give in and get new ones in white to match the cool new pulls I got. Again, sorry to tease but the pulls will be seen in the reveal!


In the meantime....I have a repair to finish! In my zeal to move on to the next door panel I got careless and dropped the one I had just painted. Besides needing to redo the orange painted border I will need to "rebuild" the corner that crunched upon impact.


Dang that particle board!!!

Saturday, May 7, 2016

So Much Yet So Little

Spring is finally cooperating by giving a weekend's worth of working on a camper weather! So very much got done in Zan's Can today. Unfortunately it doesn't look like much in pictures.


Mr. Creature Comforts continues to be an interested worker bee. The girls...not so much! So today while I put a second coat of Caicos Turquoise on the kitchen cabinet framework, he got to work on those problem support boards talked about in the post found here. He started by making a cardboard template of the support boards. Then he headed of to his stash of lauan and variety of saws while I kept painting.


The dinette cabinets got two good coats of the same Caicos Turquoise as the kitchen. Note the scrap of foam leftover from the bed project? It saved my knees and bottom from major discomfort today while painting! Began priming the inside of the storage compartments when Mr. CC appeared again with his solution to my support board dilemma.


He had mapped out the bolt head and nut locations and drilled an opening in the lauan leaving a thin and light laminate that he attached to the support board with tacks.


I'd say that tomorrow night you would see this primed and covered in faux subway tile.....but it is Mother's Day. Maybe my Mother's Day gift will be to spend more time in Zan's Can to work?? So not holding my breath on that one!

Working Weekend

Been a couple of days without updates and for that I apologize!! Between weather, work, and parenting teens Zan's Can took low priority. Not no priority just low priority. I did get some projects well underway. Buckle up because I am about to race through the many irons I have in the fire around here!! 


Cabinet doors are painted and in the process of being "decorated"! I am using ModPodge to adhere a panel of fabric on each drawer and door.


Some have gotten the next phase of "decorating" in a painted frame around the fabric panel. One more coat to even out the paint surface and I can move on to the outlining process. I plan to finish them off with a nice coat of clear sealcoat so they can be washed if needed.


Got a can of white appliance spray to paint the heater cover and the stove lid. Removed the two pieces from the Can and, after taping where necessary, got the stove lid done.....but the heater cover has presented a challenge!


Doesn't it look so nice sitting all pretty to get her new color??


Seems she isn't having anything to do with getting all shiny white! Going to sand her down tomorrow and re-wash in TSP to see if that will be enough to get the paint on nice and smooth.


Also got the dinette cushion fabric cut! Will have a more in depth tutorial on that in a future post.


Mr. Creature Comforts also pitched in and worked on the rust of the tow tongue on the Can. Decided to take my sister-in-law's advice and tried using Naval Jelly to reduce the amount of sanding required. When I emerged from my day's work on the inside, I found this waiting for me....


Now all I need to do is figure out what I should do about the Can's boo-boo on her front panel!
Meanwhile I was inside...


Taping and priming the kitchen cabinet frame. Took longer than budgeted because I decided to use the primer/sealer on every piece of wood I came across in order to extend the Can's life time well past my tenure with the camper! 

After the first coat, this is a sneak peak at the color chosen to set off my decorated doors and drawer.


So lots and lots of projects in progress all at once!! Here's hoping the rain forecast for tomorrow takes a different trajectory so I can start ticking of some things from my to-do list!

Sunday, May 1, 2016

Patiently Impatient

Watching paint dry...literally! Nothing harder for someone with instant gratification issues.


So to avoid going stir crazy cooped up in my craft space on yet another rainy spring-ish day I have pulled out a couple of really, really low priority projects.


Zan's Can has a clear decorating theme [well in my mind anyhow] and so I am customizing some fairy lights for inside and outside mood lighting. The E6000 fumes rarely bother me and I have been known to bling out dance costumes for hours. E6000 plus paint are another story!! Well that and the rainy weather that limits how much I can open the windows to ventilate. So, so jealous of my fellow PUP remodelers who are enjoying a real spring and making huge progress on their projects!!


My closing random thought for the day....


Please tell me that the Bethany company did not actually pay for interior designer advice when those two fabrics were chosen to "co-ordinate" the interior. The upper one was the original curtain fabric [now drop cloths!!] while the lower one was the upholstery fabric used on all the cushions. Do not get me wrong. I happen to LOVE orange and it will be featured in the remodel, and I happen to like busy visual fabrics, but these two just make my skin crawl!!

Back to the craft room now for an afternoon and this time wearing a mask!!

Spring Fever!

Yet another day in which Mother Nature decided to throw down rain and cold. Truly trying my patience to get back into Zan's Can and start adding COLOR! But do not worry readers, I have been plugging away inside my craft room. Since every surface is currently covered with doors and drawers in various stages of painting, there was no room to layout my fabrics to cut for the cushions and curtains. I kept busy between coats of paint working on curtain preparations.


While running through Walmart one day I scoped out a clearance end cap and discovered these room darkening curtain panels. In an effort to keep costs down I was going to use some inexpensive fabric I had found for the curtains. The fabric was very light weight though so I am now heeding the advise of found on other  PUP  remodel sites to use these blackout panels to line the decorative fabric!
To that end I spent more hours than I care to count picking out stitching on the old curtains to harvest the hanging tabs.


The Bethany seamstresses were determined that these curtains would never pull away from the tabs that hold the curtains in the C track! TRIPLE stitched they were to the original curtain!! But since they were in great shape and being desirous to avoid reinventing the wheel on hanging curtains in PUPs I removed every single one of those tabs!


The mechanics of how the tabs work can be seen from this angle. That round end has a hard plastic rod sewn into it that you feed into the open end of the C track built into the roof of the camper. The curtains hang from those tabs fed into the track. All the old curtains are currently folded into one of the black out panels awaiting the time when my cutting table is free of the doors and drawer!!


Two random thoughts to close.....


I found this label inside one of the cabinet doors. Wasn't going to peel off no matter what I tried! So I took a picture and plan to print off a couple of copies. One to go on the back of the door again and one to give to my nephew, the electrician who is helping me make the Can safe!


Secondly, I am going to have to wrap my brain around the idea that I must include the costs of manicures and chip repairs to the final total spent on the remodel! That and the price of the lotions I need to save the dry, cracked hands of mine. Shout out here to my friend's Butter Duck Farms natural lotions and salves that restore my skin after a day's work on the Can!


Since I am chomping at the bit to get back into the Can I have also been using the time checking out other PUP remodels. Quite jealous of those who live in parts of the country where the weather has been warm and sunny for a while now which allows them to crank out their remodels but in awe of their work! If you are impatient to see my reveal why don't you pop over to this blog where she features a ton of remodels on pop up campers that will keep you busy while I am waiting for Spring to actually decide to arrive for good!

Friday, April 29, 2016

Progress Despite the Weather

When last I posted, Zan's Can was closed up to protect it from the spring showers that had moved in to our area. The punky weather has been hanging around and the lovely warm temperatures have been replaced with cold. Doesn't the can look forlorn?


Remodeling an old pop up is very similar to remodeling an old home. You never know what you are in for until you start tearing into them!! The roof looked so nice at first glance. It is still keeping the Can dry but those low spots with rain water puddling up in them means my five year plan will need a revision. The roof just jumped up the list!! Fingers crossed it holds tight this summer to allow for time to flesh out the bank account.

Meanwhile, some progress is being made!! Before the can was closed up Mr. Creature Comforts and I labeled the 5 doors and 1 drawer. Not that figuring out where each one goes is that tough with so few but why make more work when a simple piece of painter's tape and a Sharpie is all it takes to be sure? We then unscrewed the hinges from the cabinet frame and brought them inside. 

Now I wasn't 100% certain on how I was going to prepare the doors and drawer for paint. I knew the faux leather contact paper that was their current surface was going, period. I read up on panting laminates and decided it just seemed too dicey to chance that my cabinet surfaces wouldn't bubble or shed the paint. I'm just not that lucky!


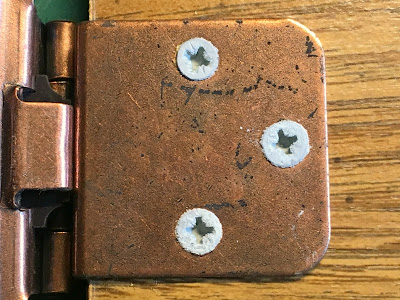
So while I mulled the options I decided to remove the hinges and pulls from the pieces. Each piece got its own baggie into which I put all the hardware because I haven't yet decided if I can afford to replace or need to paint them as well. The corrosion from years of humidity didn't help any but I did get all the hardware off cleanly.


On the inside of all the doors were these flannel bump guards which I peeled off and then used Goo Gone to get any residual adhesive. I have also made a note to go buy more for the finished product!


Since the edges of the faux leather laminate were ragged in spots I decided to just remove the whole covering. Forty year old adhesive was now brittle and with gentle persuasion using a chisel I was able to get it to peel off the particle board quite easily. I can assume that readers with newer pop ups might want to consider following the internet suggestions for painting laminate because even though mine peeled off fairly easily it was still time consuming. Having a raw particle board surface to work with also adds a few steps to the painting procedure! Back to Professor Google to learn how best to paint on raw chip board.


The glue that holds all the wood particles together in chip board needs to be protected from moisture so all the sites recommended a primer plus sealer. Since I did not like the rough surface and sanding only produced sawdust, I opted to use a paintable wood filler before priming. The product I used had a pink tint that dried to a natural light wood color. I need this because as will become apparent to the reader over this remodel....I am rather impatient! Once the product was completely dry it did have a rough surface.


I took a medium grit sanding block with gentle passes over the wood putty and ended up with nice smooth surfaces to paint. After wiping them down with a barely moist tack cloth to remove excess dust left from the sanding I was then ready for the primer+sealer. 


Then as recommended by multiple DIY sites, I painted them with Behr Multi-Surface Primer and Sealer in white. They are all currently sitting out in my craft room to dry over night. Tomorrow I plan to sand that first coat of primer and add a second because I want to be good and certain that if that roof goes before I can fix it that my doors will be impervious to moisture!!


One closing shot....


....I said I am impatient.....decided to test out the primer before I had even finished putting the wood putty on all of the doors and drawer!! The wonderful thing about this project is....it is all mine. If I want to jump around from project to project, I can!!!

Monday, April 25, 2016

We Interupt This Broadcast.....

Had a couple of free hours this afternoon. The sun was out and it was 80 degrees so I decided to work in the shade...as in inside the Can!


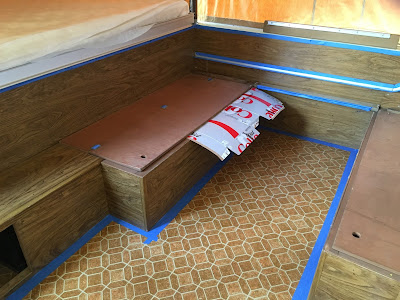
Decided after a near fail with the faux subway tile that I'd give priming a try.  Taping was not quite as time consuming as I anticipated so I dove right in to putting brush to laminate!


First coat went on very streaky with the cutting in brush I was using so I busted out the roller and was just beginning to get excited at how well that was working when Mr. Creature Comforts came bolting out of the house shouting something about getting the camper "button upped" in a hurry because one of those sudden spring thunderstorms was racing our way!!


Now mind you, when I started there was nary a cloud in the sky and the forecast was for showers during the night. I thought I had plenty of time. Mother Nature insists on playing with me!!


Since the paint was still wet there was no "closing up" the Can let alone closing her up in a hurry.


Take that Mother Nature!!! The Mother of Invention turned her propane tank into a tarp weight and some rope the previous owner left in the Can tied the tarp along the bottom. Happy to report that the Can was dry and safe....because the storm decided to take a hard turn to the North!?!? Before nightfall the paint was dry and the Can was closed up until the next dry day when there are some free hours in my schedule. That day cannot come soon enough because I am soooo ready to finish the subway tile and add more color!