Friday, April 29, 2016

Progress Despite the Weather

When last I posted, Zan's Can was closed up to protect it from the spring showers that had moved in to our area. The punky weather has been hanging around and the lovely warm temperatures have been replaced with cold. Doesn't the can look forlorn?


Remodeling an old pop up is very similar to remodeling an old home. You never know what you are in for until you start tearing into them!! The roof looked so nice at first glance. It is still keeping the Can dry but those low spots with rain water puddling up in them means my five year plan will need a revision. The roof just jumped up the list!! Fingers crossed it holds tight this summer to allow for time to flesh out the bank account.

Meanwhile, some progress is being made!! Before the can was closed up Mr. Creature Comforts and I labeled the 5 doors and 1 drawer. Not that figuring out where each one goes is that tough with so few but why make more work when a simple piece of painter's tape and a Sharpie is all it takes to be sure? We then unscrewed the hinges from the cabinet frame and brought them inside. 

Now I wasn't 100% certain on how I was going to prepare the doors and drawer for paint. I knew the faux leather contact paper that was their current surface was going, period. I read up on panting laminates and decided it just seemed too dicey to chance that my cabinet surfaces wouldn't bubble or shed the paint. I'm just not that lucky!


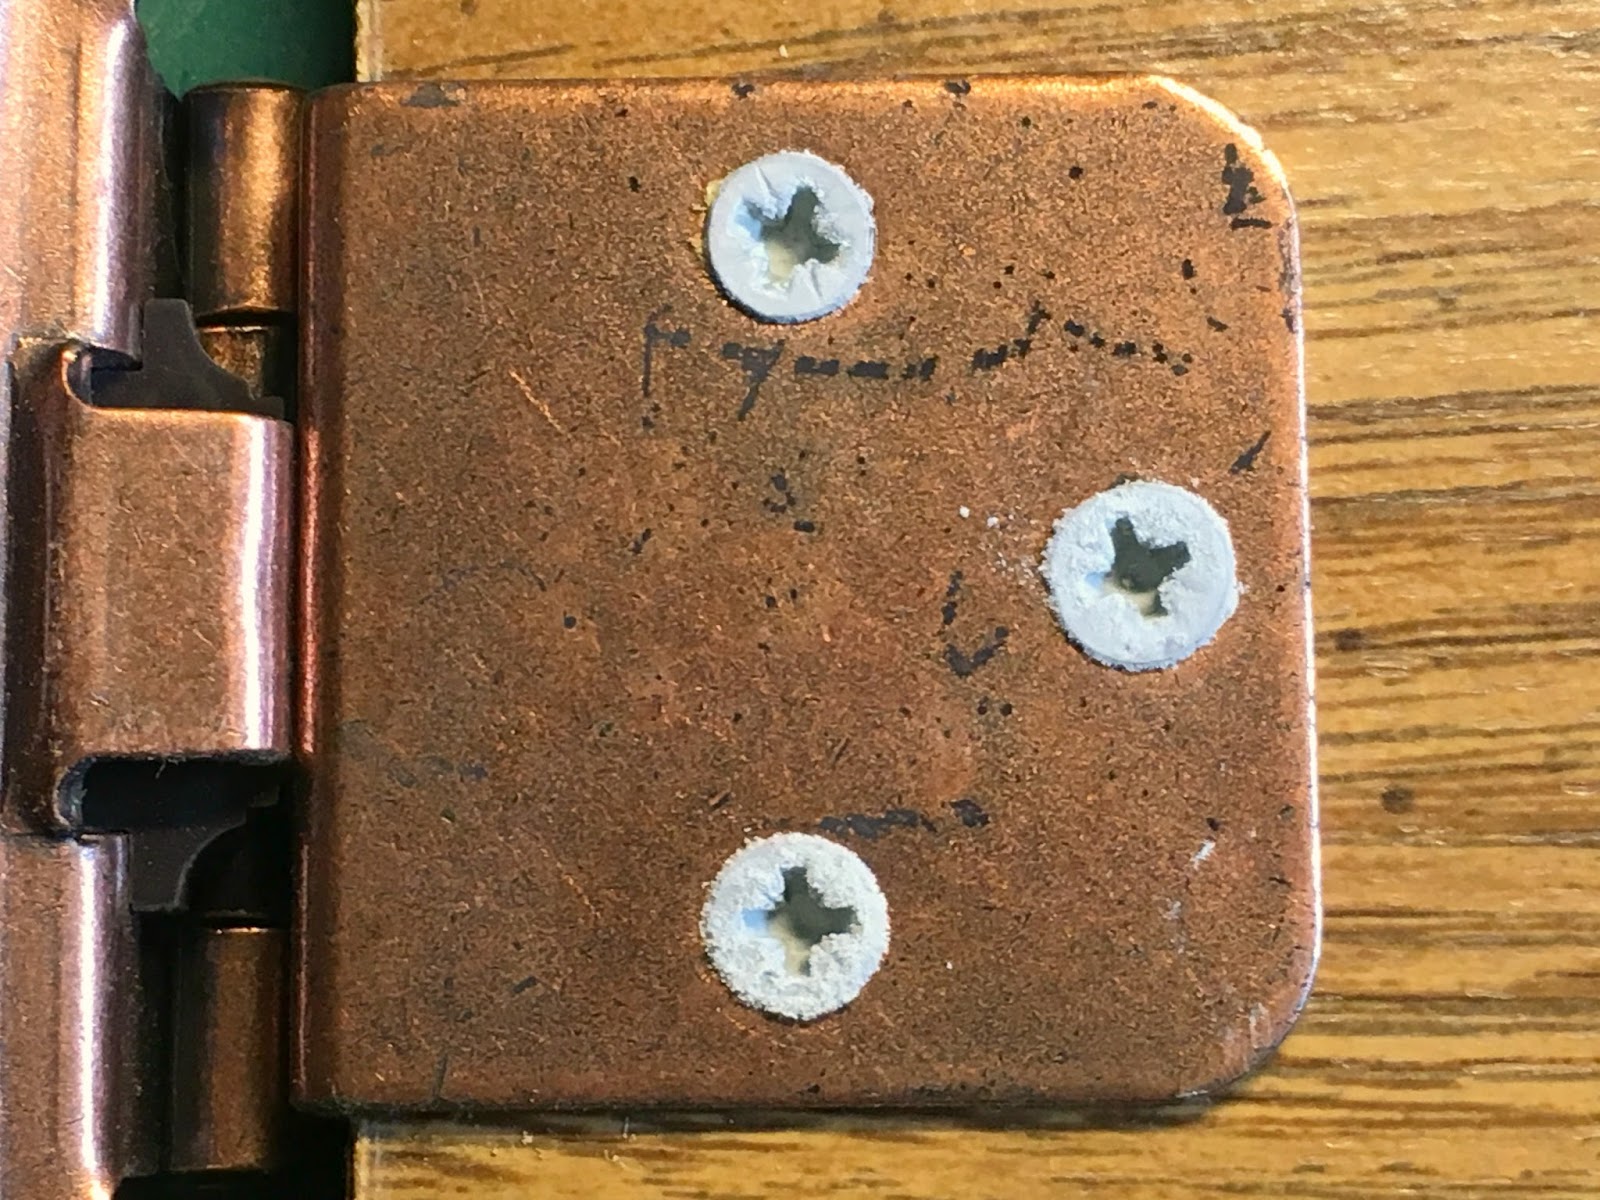
So while I mulled the options I decided to remove the hinges and pulls from the pieces. Each piece got its own baggie into which I put all the hardware because I haven't yet decided if I can afford to replace or need to paint them as well. The corrosion from years of humidity didn't help any but I did get all the hardware off cleanly.


On the inside of all the doors were these flannel bump guards which I peeled off and then used Goo Gone to get any residual adhesive. I have also made a note to go buy more for the finished product!


Since the edges of the faux leather laminate were ragged in spots I decided to just remove the whole covering. Forty year old adhesive was now brittle and with gentle persuasion using a chisel I was able to get it to peel off the particle board quite easily. I can assume that readers with newer pop ups might want to consider following the internet suggestions for painting laminate because even though mine peeled off fairly easily it was still time consuming. Having a raw particle board surface to work with also adds a few steps to the painting procedure! Back to Professor Google to learn how best to paint on raw chip board.


The glue that holds all the wood particles together in chip board needs to be protected from moisture so all the sites recommended a primer plus sealer. Since I did not like the rough surface and sanding only produced sawdust, I opted to use a paintable wood filler before priming. The product I used had a pink tint that dried to a natural light wood color. I need this because as will become apparent to the reader over this remodel....I am rather impatient! Once the product was completely dry it did have a rough surface.


I took a medium grit sanding block with gentle passes over the wood putty and ended up with nice smooth surfaces to paint. After wiping them down with a barely moist tack cloth to remove excess dust left from the sanding I was then ready for the primer+sealer. 


Then as recommended by multiple DIY sites, I painted them with Behr Multi-Surface Primer and Sealer in white. They are all currently sitting out in my craft room to dry over night. Tomorrow I plan to sand that first coat of primer and add a second because I want to be good and certain that if that roof goes before I can fix it that my doors will be impervious to moisture!!


One closing shot....


....I said I am impatient.....decided to test out the primer before I had even finished putting the wood putty on all of the doors and drawer!! The wonderful thing about this project is....it is all mine. If I want to jump around from project to project, I can!!!

Monday, April 25, 2016

We Interupt This Broadcast.....

Had a couple of free hours this afternoon. The sun was out and it was 80 degrees so I decided to work in the shade...as in inside the Can!


Decided after a near fail with the faux subway tile that I'd give priming a try.  Taping was not quite as time consuming as I anticipated so I dove right in to putting brush to laminate!


First coat went on very streaky with the cutting in brush I was using so I busted out the roller and was just beginning to get excited at how well that was working when Mr. Creature Comforts came bolting out of the house shouting something about getting the camper "button upped" in a hurry because one of those sudden spring thunderstorms was racing our way!!


Now mind you, when I started there was nary a cloud in the sky and the forecast was for showers during the night. I thought I had plenty of time. Mother Nature insists on playing with me!!


Since the paint was still wet there was no "closing up" the Can let alone closing her up in a hurry.


Take that Mother Nature!!! The Mother of Invention turned her propane tank into a tarp weight and some rope the previous owner left in the Can tied the tarp along the bottom. Happy to report that the Can was dry and safe....because the storm decided to take a hard turn to the North!?!? Before nightfall the paint was dry and the Can was closed up until the next dry day when there are some free hours in my schedule. That day cannot come soon enough because I am soooo ready to finish the subway tile and add more color!

Sunday, April 24, 2016

A Little This, A Little That

Today was a perfect weather day to get back to work on Zan's Can and boy did we! It was just one of those days when the bulk of our time was spent on prep work that doesn't look showy. It was just Mr. Creature Comforts and I today as Sweet Pea was sleeping off Prom and Shutterfly was sleeping off a "sleepless over".

First up was the bumper. When last we saw that rear bumper it had been given a thorough cleaning to remove the rust and was about to be painted with a glossy black Rustoleum. Then work, Prom and bad weather caused us to close the Can up until the next day like today arrived. Rust removed bumper and spring bad weather....yep you guessed it!!


So out came the sanding brick and wire brush and the newest crop of rust was removed!!


I then went over the bumper with a dry cloth followed by a rub down with rubbing alcohol to remove the dry, powdery rust residue. Once the alcohol evaporated we were set to paint.


P.S.> Lesson learned last time and today I wore gloves to protect the manicure !!


Just a simple coat of paint can make a tired old lady look much better!! Next up will be the front tongue but first I'm off to find naval jelly which has been recommended to me for more thorough rust removal with less elbow grease required.

 Both of the bunks are now ready for covers and bedding now that I've added 1.5 inch memory foam mattress toppers. I am all about comfort and would have gone with an even deeper memory foam topper except for two limiting factors. I would be lying if I didn't say that cost was the primary factor! Four inch memory foam mattresses were just too pricey for my non-existent budget. For those who are reading and thinking that they are willing to spend that money it is time to mention the second factor, space! Before you add too much depth you need to test your pop up to see how thick the mattresses can be and still allow the roof to lock down . While others use crush-able items, like empty tissue boxes, set on the bed as the lid is lowered to measure how much space you have I was able to see I had almost no room. That and no money meant that this KMart sale topper was my choice!


$30 each for a total of $60 seems like quite the splurge but my old bones dictated that I do the most I could to ensure my sleeping spot was as comfortable as I could make them!.


All of the cabinet doors and drawer were labeled and removed and will be painted inside in my sewing/craft room. The bracing bar in the icebox opening was removed and the floors scrubbed again. The heater cover will be coming off as well as the paint plan includes an 
update for that as well.

Then there is no photographic documentation of the visit by my Electrician Nephew to asses Zan's current state of wiring. Seems it is highly outdated and very unsafe!! Here is where I tell a reader trying to keep costs down, if you have a friend/relative who is in the trades try and work out a barter!! In return for my designing a full back tattoo He will bring the Can up to date and safe!

Hoping the rain forecast for tomorrow is wrong....I started the next inside project and wasn't able to get very far....


...but I am already EXCITED about the clean and fresh look it promises to give the Can!!

Thursday, April 21, 2016

Needles and Pins


 Besides being back to the day job, the weather took a turn back to a typical Midwest spring. The whole April showers thing you know? So the progress on Zan's Can is on hold until the weekend but even then Sweet Pea's Prom will likely eat into rehab time. Meanwhile I am way overthinking the whole canvas repair issue as is my habit for all things in life.


Just know that we can't even hope for a Memorial Day camp out until things like zippers pulling out get repaired!! Had thought I'd have a post joking about how men do repairs...


...like the very frequent "go to" repair item of duct tape!!! The more I emptied out the Can's cabinets and drawers the first day home the funnier the topic of how the sexes approach repairs. The show stopper was when I found this in one of the drawers!! 


Have yet to run into the spot in the Can where this glue was used but it will not surprise when I do find that repair. The humorous post kind of feel apart when Mr. Creature Comforts and the Leprechaun dove straight in to the door repair and with the discovery that Mr. Single Dad did actually get close to a proper repair.....


...when he used safety pins!! Now pins are a step in the right direction. I have the upholstery thread and heavy duty needles on the ready to start sewing the Can's canvas but must admit to fantasizing about getting a whole new skin for her. A skimming of the websites of the highest rated canvas replacement companies seems to suggest that a whole replacement would run $850-$1250, yikes. The bigger kicker is that those companies are saying this is their busiest season and the turn around time is in the 8-10 weeks range right now. So this sewer could not be faulted for toying with the idea of using next winter's hibernation period for the Can to sew one from scratch in a unique color not offered by any of the companies?? Maybe even go off from the herd altogether and use a print????

Meanwhile, I am in my sewing room!! Sweet Pea and her BFF both need alterations on their Prom dresses completed by tomorrow night. The box with the cushion fabrics has arrived and is sitting on my cutting table tempting me mightily.....trying to not even open it so as not to give into my instant gratification!

Wednesday, April 20, 2016

Trending now...#PUPhousewarmingparty


Found an on-line camping supplier this evening. I'd rather not admit just how long the site held me captive. But as I paged through all 75 pages of 100 items per page I decided to put the items I felt I really, really could not live without into the "shopping cart" to see how much money we are looking at to kit the Can out.


 The 20 foot telescoping flag pole did NOT find its way into my cart but did serve as comic relief around tonight's dinner table.
Despite Sweet Pea's impassioned pitch on the absolute necessity of a folding pet bed, it also did not make it into the shopping cart!! But $250 worth of items did, which does give pause to the hard cash needed to satisfy this camping bug that has bit.


Got the insanely ingenious idea that once the Can is nearing completion that I need to have a house warming party, right??? Just send out a "registry" of all my must haves and wait for the gifts to come rolling in...that's the ticket!!! ......sigh....worth floating the idea, no?....gauche, I know...not going to happen but a girl can dream, right? Just a well placed Tweet with #PUPhousewarmingparty...get it trending...you never know?!?!

Mr. Creature Comforts finished painting the bunk while I was at work. Adding the foam travertine padding and black nylon lift straps first thing in the morning and then I can check off another "to do" item from the long, long list. Did I mention yet that Shutterfly is campaigning HARD for a Memorial Day camping trip?


Monday, April 18, 2016

Ideas for a Solution to a Problem Wanted!!!

As we finish off the beds my thoughts turn to the interior. Found a solution to the painting the faux wood cabinetry in the Can that I simply love!! These Faux Subway Tile peel and stick tiles [ http://www.homedepot.com/p/Smart-Tiles-9-70-in-x-10-95-in-Mosaic-Decorative-Wall-Tile-Peel-and-Stick-in-Subway-White-SM1020-1/202016981   ] are light weight and washable so a win win as far as campers are concerned.

The problem is that the construction techniques on Zan's Can are sooo 1976!! As in the fasteners are not "hidden" and bolt ends and nuts protrude where I want to put the tile. Been throwing solutions around and around in my brain but nothing is jumping out as a clear winner. Throwing this out to my readers!! How would you work around the nuts and bolts??


A Little Housekeeping

Last day before the day job resumes to get out and work on Zan's Can was today. While Mr. Creature Comfort was taping and painting the other bunk I decided to stay out in our deliciously warm spring and address the rusty back bumper. Another project that will end up taking far longer than I originally expected. Since I was dubious about the infamous Coke technique that several felt compelled to suggest to me, I decided to go old school.


Wire wheel in the hubby's power drill was the first stage. Some words of advise to the ladies diving into a camper remodel, this wheel will bounce and pull like a bucking bronco!! Two hands and total attention were needed to keep from damaging the paint job on the body of the Can. One of the positive things I learned today is that all that "rust" wasn't all rust!! I quickly learned that the bumper had once been painted a brick red. The second positive bit of news is that all the rust is just surface and not structural.


I took the original spare tire off because the initial peek behind worried me. Could not figure out if I was looking at rust/corrosion or debris build up? Just on a roll with positive news today as it was just debris.


Good call on removing it though! Now it allowed me to find the rust on the mounting bracket in time to clean and paint it with the bumper.


After I determined that all of the rust reachable by the wire brush had been removed it was time to go after the odd pockets and corners. I used sand paper and a sanding lock and might even go over it with steel wool before all is said and done.Please wear eye protection and a mask when doing this kind of work!! The amount of fine particulate raised from this process is significant!


Hmmmmmm, so do you think I need to include the manicure repairs in the price tag on this remodel??? Gloves would surely help especially if you have sensitive skin but as  I was assessing the "doneness" of a stretch of the bumper  by running my hand over to feel how smooth it had become the gloves would have been more work for me.

Every fiber of my being wanted to pop open the can of Rustoleum and finish up the paint job!! By the time I had gotten the bumper cleaned up to my satisfaction is was already nigh on supper time ....and with work in the morning...and rain in the forecast for tomorrow I stopped and closed the Can up tight and moved her to the back of the drive.  Trying to keep the snobbery snitches in the neighborhood from setting the real police on us. Say what????? Sigh. We live in an urban area with zoning laws that prohibit recreation vehicles from being parked in front of the house for longer than 3 days.


No fear that I am going to leave you high and dry here on the blog though!! Even with work, Prom for Sweet Pea, and two more Prom dresses to alter [one of which is Sweet Pea's!!] I have plenty of topics to cover.


Sneak Peek

If there was a time stamp on this [which there very well may be but I am seriously tech challenged and don't know if there is or not!!] the reader would see that despite 3 straight days of working on Zan's Can, older women tend to have sleep issues!! So what do I do into the wee hours of the morning instead of sleep? Math!! Bet that wasn't your first guess?!?! But it is a very complicated series of equations to see just how much of my final fabric selections for the cushions and curtains I can afford that fills the sleepless moments this morning. Even though the Can was free-ish, I NEED to keep this remodel on a starvation budget. If there is to be money to take her out on the road I must penny pinch as tightly as I can!! I thought my biggest splurge could be the thing I love the most, buying fabric, until today's trip to the local HD. Found a fantastic and light weight solution to the rippling when wet wood colored laminate problem...that costs quite a bit more than a can of paint. But that's another story for another day. Today it is fabric and color palette commitment day!
 Drum roll please.......


Mr. CC could also have been called Nothing But Neutral. Our home must be bland, boring, neutral or he cannot function. So in another "compromise" in my adult life this color loving Mama only found visual stimulation in the fabrics in her sewing room. The Can is mine....all MINE and anyone who cannot take bright and colorful and orange is just out of luck. So I go off now at 3:30am local time to hit "Buy Now" on my shopping cart containing the above fabrics and I am a happy camper to be!

Sunday, April 17, 2016

Resting Easy

After a brief chat, I convinced Mr. Creature Comforts to humor me in my action plan. I decided I needed to see results ASAP to try and keep my enthusiasm level up at full volume. To that end we started with "my bed". You know, because Sweet Pea claimed one already??? Go get a refreshment and stick with me because this will be a looooong post!


The process started with Mr. Creature Comforts giving the bunk a quick "hoovering"....we speak a rather unique combination of American English, Irish English, Irish, and Spanish in this house. While the girls and I vacuum he "hoovers". Oh wait, I mean I vacuum and he "hoovers" because the girls are not inclined to the domestic arts usually.


Except if you happen to be excited about the new to us camper. Shutterfly found a good sweep was not beneath her this once anyhow.


Next up was a thorough scrubbing but the matter of a tent canvas needed to be addressed first!


In fairness to Mr. CC this photograph is pre-hoovering!! Back in the day it appears that the staple gun was a favorite tool as most all of the Can is held together with staples!! The long side of the bunk had the wall of the canvas tent stapled to it. As I made the executive decision to pull the staples and free the bunk of all its canvas, Mr. CC came up with a brilliant solution to my dilemma of how to repair the failing seams. Since it is attached up at the ceiling pretty firmly and I am loathe to open that Pandora's Box just yet I was resigned to doing the multitude of canvas repairs by hand. His idea....bring my machine out to the camper table and do all the repairs that can reach thus reducing the amount of hand sewing in my future. He is a keeper that Irishman of mine!!!


The bunks are lifted and pulled over the side walls of the Can with these cotton webbing straps in sad, sad condition.


Yes, everything was held by staples!! The straps have been sprung free of their servitude. Now there was full access to get to the scrubbing portion of our story. TSP and water combined with protective gloves and scrubbing sponges were employed next.


Teamwork. This old couple finally have mastered teamwork. Took twenty years but better late than never!!


Gag!! I mean I was prepared for filth given the previous owner was a single dad and his teenage son but to see it in real life, yuck.


This may be the last picture of me working on the Can if they insist on catching me sweaty and burned despite remembering to wear my hat. Irish Americans are just like the Irish. We don't do sun well!! We love to soak it in but it doesn't play fair and burns any exposed surface in a nanosecond! All that to say that my bed got a paint job.


Not as good a paint job as my sister would have given it but seeing as how it will be under a mattress and a tent canvas....good enough! The plywood was begging for paint it was so dry!! I figured two coats of paint might extend the life of the bunk long enough to last the duration of our relationship.

I did this while Mr. CC was catching some of the golf tournament on TV. It dried over dinner and then onward and upward!!


Home Depot to the rescue once again. The bottom of the bunk's short ends slide in and out over the metal side walls and showed a lot of wear and tear on the plywood. I decided to try and see if I could help preserve them by adding this plastic corner guard.


Time will tell if this helps. I am kind of thinking a harder plastic or silicone product would do better but in the meantime this will do!! Should there be any news on this in the future I will be sure to update here on the blog.


I have been trying to come up to speed on glamping  remodels over on Pinterest and quite a few pins reference the increase comfort that can be obtained by using these fatigue preventing foam floor tiles. Lucky me that my new best commercial retailer Home Depot has expanded from the standard black that others used on their remodels.


I get faux travertine in Zan's Can!! They are easy peasy to cut and lock together like puzzle pieces. I got ever so lucky that the bunk is two squares wide meaning the only cuts I had to do were to fill that last 5 inches or so at the one end. [note the pre-stageing of the next step LOL]


A marker, measuring tape, straight edge and cutting implement are all you need for this bunk upgrade.


Simply cut on the line, fit the tabs into the slots and a light weight upgrade option to improve the bunk comfort is done!


Really not sure why this makes me so happy since a mattress will be covering it anyhow?? I am positive it is that sense of accomplishment that one more project on the Can is complete!! Oh, those straps...


JoAnn Fabrics this time folks!! Wider black nylon strapping replaced the green cotton and right down in my sewing room I found upholstery tacks to secure it to the side. Now just to get the foam and coverings in order! But that will wait until after Sweet Pea's bed gets completed which I am kind of hoping will happen by tomorrow....because then I have to go back to the day job. I'm still keeping my skills up for the day job though:


Extractions are extractions folks!!!