Remodeling an old pop up is very similar to remodeling an old home. You never know what you are in for until you start tearing into them!! The roof looked so nice at first glance. It is still keeping the Can dry but those low spots with rain water puddling up in them means my five year plan will need a revision. The roof just jumped up the list!! Fingers crossed it holds tight this summer to allow for time to flesh out the bank account.
Meanwhile, some progress is being made!! Before the can was closed up Mr. Creature Comforts and I labeled the 5 doors and 1 drawer. Not that figuring out where each one goes is that tough with so few but why make more work when a simple piece of painter's tape and a Sharpie is all it takes to be sure? We then unscrewed the hinges from the cabinet frame and brought them inside.
Now I wasn't 100% certain on how I was going to prepare the doors and drawer for paint. I knew the faux leather contact paper that was their current surface was going, period. I read up on panting laminates and decided it just seemed too dicey to chance that my cabinet surfaces wouldn't bubble or shed the paint. I'm just not that lucky!
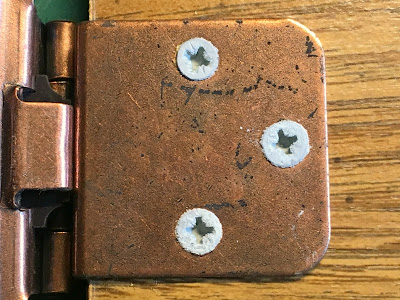
So while I mulled the options I decided to remove the hinges and pulls from the pieces. Each piece got its own baggie into which I put all the hardware because I haven't yet decided if I can afford to replace or need to paint them as well. The corrosion from years of humidity didn't help any but I did get all the hardware off cleanly.
On the inside of all the doors were these flannel bump guards which I peeled off and then used Goo Gone to get any residual adhesive. I have also made a note to go buy more for the finished product!
Since the edges of the faux leather laminate were ragged in spots I decided to just remove the whole covering. Forty year old adhesive was now brittle and with gentle persuasion using a chisel I was able to get it to peel off the particle board quite easily. I can assume that readers with newer pop ups might want to consider following the internet suggestions for painting laminate because even though mine peeled off fairly easily it was still time consuming. Having a raw particle board surface to work with also adds a few steps to the painting procedure! Back to Professor Google to learn how best to paint on raw chip board.
The glue that holds all the wood particles together in chip board needs to be protected from moisture so all the sites recommended a primer plus sealer. Since I did not like the rough surface and sanding only produced sawdust, I opted to use a paintable wood filler before priming. The product I used had a pink tint that dried to a natural light wood color. I need this because as will become apparent to the reader over this remodel....I am rather impatient! Once the product was completely dry it did have a rough surface.
I took a medium grit sanding block with gentle passes over the wood putty and ended up with nice smooth surfaces to paint. After wiping them down with a barely moist tack cloth to remove excess dust left from the sanding I was then ready for the primer+sealer.
Then as recommended by multiple DIY sites, I painted them with Behr Multi-Surface Primer and Sealer in white. They are all currently sitting out in my craft room to dry over night. Tomorrow I plan to sand that first coat of primer and add a second because I want to be good and certain that if that roof goes before I can fix it that my doors will be impervious to moisture!!
One closing shot....
....I said I am impatient.....decided to test out the primer before I had even finished putting the wood putty on all of the doors and drawer!! The wonderful thing about this project is....it is all mine. If I want to jump around from project to project, I can!!!


No comments:
Post a Comment